Use https://seceonhelp.freshdesk.com/support/login to access updated Knowledge Base Articles, Submit Technical Support Tickets and Review Status of submitted support tickets.
Palo Alto Firewall- Syslog Configuration
- Customer Success & Engineering (Unlicensed)
Overview
We are providing you with the steps to integrate your Palo Alto Firewall- Syslog with Seceon SIEM so One can have Comprehensive visibility and Proactive Threat Detection in your Environment. There will be a log transfer between your firewall to APE(Analytics and Policy Engine) via CCE (Collection and Control Engine ). In this document, we are guiding you through the steps for Log forwarding.
To facilitate the integration with external log parsing systems, the firewall allows you to customize the log format; it also allows you to add custom Key: Value attribute pairs. Custom formats can be configured under
Device > Server Profiles > Syslog > Syslog Server Profile > Custom Log Format:
Step 2. Create a log forwarding profile
Go to Objects > Log forwarding. Click Add.
- Name: Enter a profile name (up to 31 characters). This name appears in the list of log forwarding profiles when defining security policies. The name is case-sensitive and must be unique. Use only letters, numbers, spaces, hyphens, and underscores.
- Syslog: Select the syslog server profile to specify additional destinations where the traffic log entries are sent.
- Click 'OK' to confirm your configuration.
Your Log Forwarding Profile is now created, as shown in the following example:
Step 3. Use the log forwarding profile in your security policy
Go to Policies > Security
Select the rule for which the log forwarding needs to be applied (Any Allow) in the following example:
Next, go to the Actions tab, select Log Forwarding Profile from the dropdown, and click OK when you are happy with your configuration:
After clicking OK, you will notice the forwarding icon in the 'Options' column of your security rule:
Step 4. Don't forget to commit your changes when you're finished.
Repeat the same steps for threat logs like we did for traffic here.
Reference Link:
Traffic Logs: https://knowledgebase.paloaltonetworks.com/KCSArticleDetail?id=kA10g000000ClRxCAK
Threat Logs: https://knowledgebase.paloaltonetworks.com/KCSArticleDetail?id=kA10g000000ClFfCAK
Verification of configuration
Verification of configuration can be done in two ways:
From the Collector-Syslog Server (CCE): This can involve logging into the CCE and checking the configuration settings, testing connectivity and functionality of the various components, and comparing the actual results against the expected or desired outcomes.
From the UI: This can involve logging into the user interface and checking the configuration settings, monitoring the logs and flows, and comparing the actual results against the expected or desired outcomes.
Both methods can be used to ensure that the system is properly configured and working as intended.
Using UI
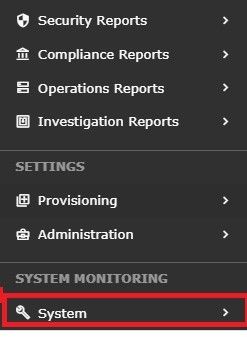
STEP 1:Log in to UI >> SYSTEM
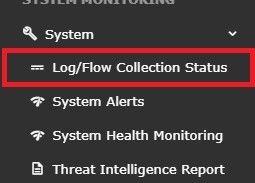
STEP 2: >> Logs and flows collection status
STEP 3: >>To verify the source device IP from the UI:
Log in to the user interface
Navigate to the "SYSTEM" section
Look for the "SOURCE DEVICE IP"
Check the IP address that is displayed
Compare the IP address displayed against the expected source device IP
This will allow you to ensure that the system is properly identifying the source device IP and that it matches the expected IP address..

Related content
Seceon Inc. All rights reserved. https://www.seceon.com