A network security group (NSG) enables you to filter inbound traffic to, and outbound traffic from, a virtual machine (VM). You can log network traffic that flows through an NSG with Network Watcher's NSG flow log capability.
The instructions given below are for:
- Enabling Network Watcher.
- Registering the Microsoft.Insights provider
- Enabling a traffic flow log for an NSG, using Network Watcher's NSG flow log capability
- Configuring the CCE to get the Azure NSG logs ingested, using the information obtained after performing point 1,2 and 3.
1. Enabling Network Watcher
If you already have a network watcher enabled in the East US region, skip to Register Insights provider.
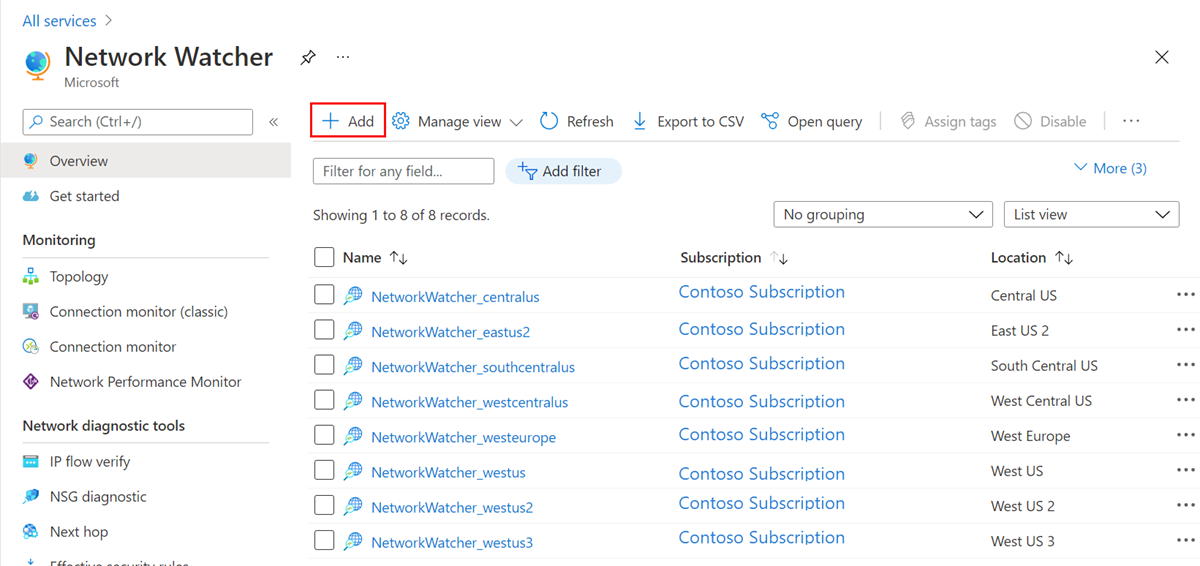
In the portal, select All services. In the Filter box, enter Network Watcher. When Network Watcher appears in the results, select it.
Select Regions, to expand it, and then select ... to the right of East US, as shown in the following picture:
Please note:
'US East' region is used as an example. Please use the region specific to the customer environment instead.
Select Enable Network Watcher.
2. Registering Insights provider
NSG flow logging requires the Microsoft.Insights provider. To register the provider, complete the following steps:
In the top, left corner of portal, select All services. In the Filter box, type Subscriptions. When Subscriptions appear in the search results, select it.
From the list of subscriptions, select the subscription you want to enable the provider for.
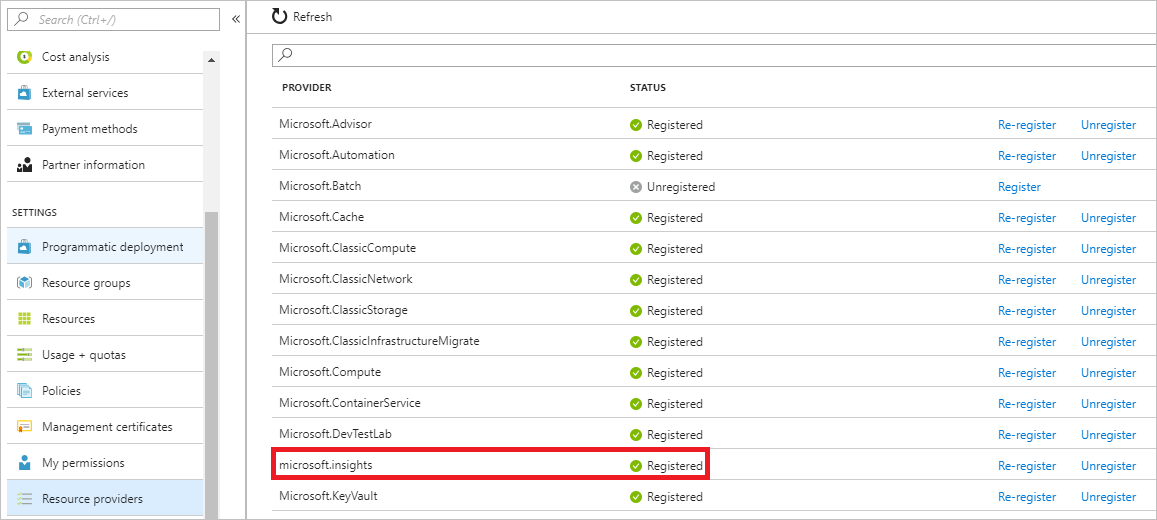
Select Resource providers, under SETTINGS.
Confirm that the STATUS for the microsoft.insights provider is Registered, as shown in the picture that follows. If the status is Unregistered, then select Register, to the right of the provider.
3. Enabling a traffic flow log for an NSG, using Network Watcher's NSG flow log capability
NSG flow log data is written to an Azure Storage account. To create an Azure Storage account, select + Create a resource at the top, left corner of the portal.
Select Storage, then select Storage account - blob, file, table, queue.
Enter, or select the following information, accept the remaining defaults, and then select Create.
Setting Value Name(Azure storage account name- Please make a note of it , it will be required while configuring the CCE ) 3-24 characters in length, can only contain lowercase letters and numbers, and must be unique across all Azure Storage accounts. Location Select East US Resource group Select Use existing, and then select myResourceGroup The storage account may take around minute to create. Don't continue with remaining steps until the storage account is created. If you use an existing storage account instead of creating one, ensure you select a storage account that has All networks (default) selected for Firewalls and virtual networks, under the SETTINGS for the storage account.
Note
While Microsoft.Insight and Microsoft.Network providers are currently supported as trusted Microsoft Services for Azure Storage, NSG Flow logs is still not fully onboarded. To enable NSG Flow logging, All Networks must still be selected until this feature is fully onboarded.
In the top, left corner of portal, select All services. In the Filter box, type Network Watcher. When Network Watcher appears in the search results, select it.
Under LOGS, select NSG flow logs, as shown in the following picture:
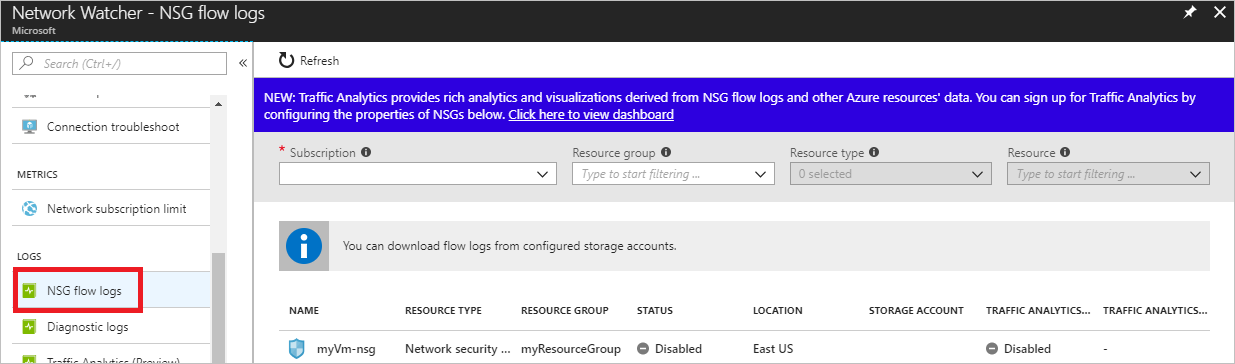
From the list of NSGs, select the NSG named myVm-nsg.
Under Flow logs settings, select On.
Select the flow logging version. Version 2 contains flow-session statistics (Bytes and Packets)
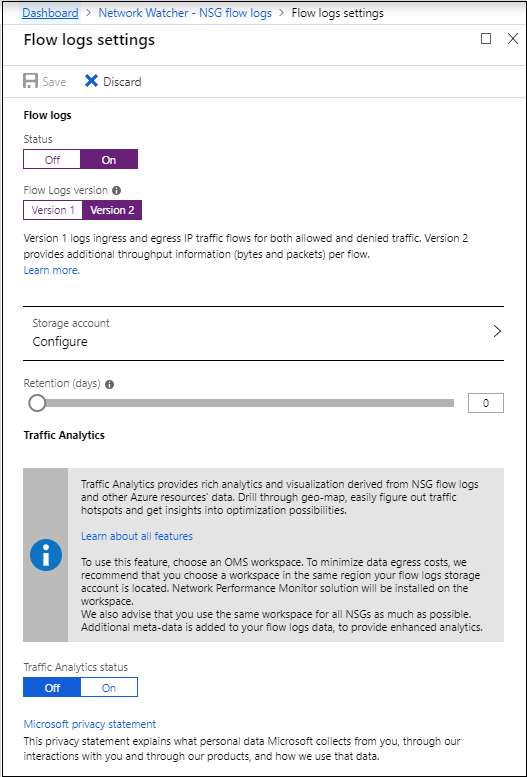
Select the storage account that you created in step 3.
Set Retention (days) to 5, and then select Save.
4. Configuring the CCE to get the Azure NSG logs ingested
- Login to the CCE as "seceon" user.
- Get into the CCE package folder.
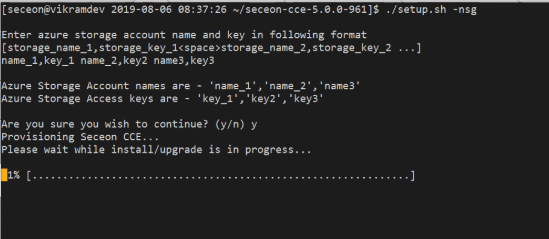
- Run the given command, and follow the wizard: ./setup.sh -nsg
Enter azure storage account name and key in the following format
[ storage_name_1,storage_key_1<space>storage_name_2,storage_key_2 ....]
name_1,key_1 name_1,key_2 name3,key3
Azure Storage Account names are - 'name_1', 'name_2', 'name3'
Azure Storage Access keys are - 'key_1', 'key2' , 'key3'
Are you sure you wish to continue? (y/n) y
Provisioning Seceon CCE...
Please wait while install/upgrade is in progress...
1% [ ............................................................................................ ]
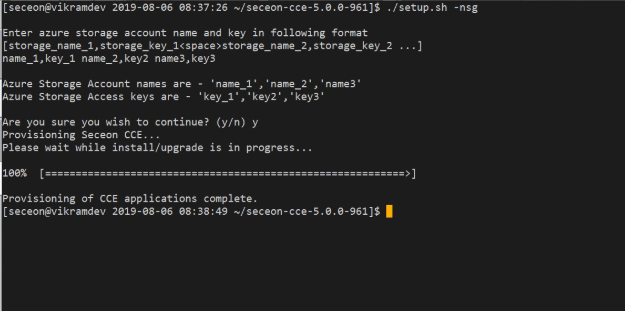
Provisioning of CCE application complete.
Please note
In this process, we have assumed that the base CCE installation is properly done, before implementing the instructions given in step 4. name_1,name_1,name3, are example names used for storage accounts and key_1, key_2, key3 , are example names used for keys, here in these instructions.